
Software Engineering at Amity — Pandemic Edition Part II
September 21, 2020
Read

Designing multiple systems with similar foundations but varying ingredients just got much easier.
Have you ever wanted to design two systems that have similar foundations and capabilities but with varying ingredients to form the object? It might seem like an easy solution to provide different parameters for each subclass. However, multiple subclasses that need to override the constructor might also have to own those unnecessary properties into its interface. An alternative solution is a design pattern that also considers a Creational Design Pattern, a default pattern on Android Design. This is called the Builder Pattern.
First off, let’s start with the basics on what is a Builder Pattern. Builder is a creational design pattern that lets you construct objects step by step per user requirement. The pattern allows you to produce different types and representations of an object using the same construction code. It refers to a declarative way to construct an object. Even better, a Builder Pattern can be included as Reactive Programming as well!
Let’s start with the common problem, “A Car Company”. Company “A” is a big brand company and it has multiple products waiting to be made. This company will make a “CarA” until “CarE”. They have 5 types of cars, including a car with a single door, sports car, family car, SUV, and a truck. We may approach this task by extending a “Car” base class and using the subclasses to override the necessary function — however, we will end up with tons of subclasses and parameters. We could also simplify it by having one Base Class that owns a huge constructor, but those subclasses will need to override the constructor with all of the parameters from possible combinations. The constructor with lots of parameters has various downsides, as not all the parameters are needed at all times.
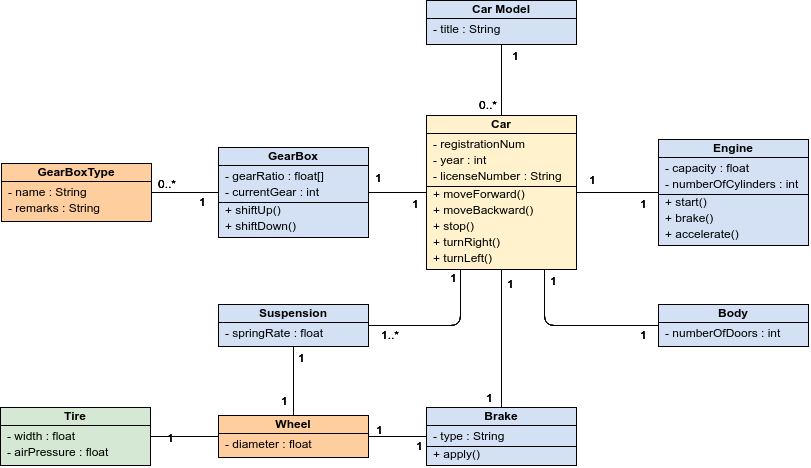
Yep, by using a builder pattern we eliminate that construction logic. The pattern will extract and define the behavior of construction into steps. We may have buildDoors, buildWheels, buildEngine, buildColor, buildExhaust. We don’t need to call every step if we don’t need it. If we do need to have another builder for another type of car with a different implementation of each step, we can make different builders and implement it in a different way!
For example, imagine a builder that builds a car with 4 sports wheels and 2 doors, a second one that builds everything with 4 normal wheels and 4 doors, and a third one that uses 2 doors and a big wheel. By calling the same set of steps, you get a sports car from the first builder, a normal family car from the second, and a Sport SUV from the third. However, this would only work if the client code that calls the building steps is able to interact with builders using a common interface. We are also able to escalate this by having another Manager class to manage the specific builder of the process of creating the car in the company.
How do we achieve it in iOS? There are multiple ways: we can construct in the form of a block, or we can achieve it by setting it within the builder constructor, or even calling it in a declarative way. How do these options differ from one another?
NOTE: All of the code below is not in full code and not executable as some unnecessary objects have been cut. This simply shows the core of the definition base on the use case. You can generate, modify or enhance this code to be more powerful as long as it still conforms to the Builder Pattern definition.
{% c-block language="swift" %}
// This one is a SportCarBuilder for building a sport car
// We just need two properties of wheel and color that can be added and modified
// However for engine and door has been defined by SportCar class
final class SportCarBuilder {
private var wheel: Wheel = Wheel(type: .racing(tyre20))
private var color: Color = Color(.red)
func withColor(color: UIColor) {
self.color = Color(color)
}
func withWheel(type: WheelType) {
self.wheel = Wheel(type: type)
}
func build() -> SportCar {
return SportCar(wheel: wheel, color: color)
}
}
// This one is a SportCar class that subclass of the Car base class
// Car base class has 4 properties, this class will initialize through the base class with designated parameters that we define for SportCar
final class SportCar: Car {
init(wheel: Wheel, color: Color) {
super.init(doors: Door(2), engine: Engine(V85000), wheel: wheel, color: color)
}
}
// How to call :
let sportCar = SportCarBuilder()
.withColor(color: .red)
.withWheel(type: .normal)
.build()
// sportCar.wheel === .normal --> Defined by user
// sportCar.engine === Engine(V85000) --> Defined by SportCar implementation
{% c-block-end %}
In the above code, it is pretty clear that when we want to get the sportCar Object, we can easily call the Builder and add the necessary requirement/modifier into the Builder. This way, we are defining the behavior of what we want to the Builder (declarative) without intervening with the implementation. SportCar also hides the Engine and Door properties from the Car base class because it will automatically be adjusted in the SportCar class instead.
{% c-block language="swift" %}
// We reuse the above SportCarBuilder, we just change some interface
// Notice we instead are using the block for update the necessary properties
class SportCar {
typealias Builder = (builder: SportCarBuilder) -> Void
private init(builder: SportCarBuilder) {
super.init(doors: Door(2), engine: Engine(V85000), wheel: builder.wheel, color: builder.color)
}
static func make(with builderBlock: Builder) -> SportCar {
let builder = SportCarBuilder()
builderBlock(builder)
return SportCar(builder: builder)
}
}
// This is the way we will use by defining the properties inside the block
let sportCar = SportCar.make { builder in
builder.color = .red
builder.wheel = .racing
}
{% c-block-end %}
The above code is pretty straight forward, we will define the behavior we want through the completion block when we call the make function inside SportCar class. In most cases, the second way is used by Objective-C developer.
{% c-block language="swift" %}
// This one is a SportCarBuilder for building a sport car
// We just need two properties of wheel and color that can be added and modified
// However for engine and door has been defined by SportCar class
final class SportCarBuilder {
private var wheel: Wheel = Wheel(type: .racing(tyre20))
private var color: Color = Color(.red)
func withColor(color: UIColor) {
self.color = Color(color)
}
func withWheel(type: WheelType) {
self.wheel = Wheel(type: type)
}
func build() -> SportCar {
return SportCar(wheel: wheel, color: color)
}
}
// This one is a SportCar class that subclass of the Car base class
// Car base class has 4 properties, this class will initialize through the base class with designated parameters that we define for SportCar
final class SportCar: Car {
init(wheel: Wheel, color: Color) {
super.init(doors: Door(2), engine: Engine(V85000), wheel: wheel, color: color)
}
}
// How to call :
let sportCar = SportCarBuilder()
.withColor(color: .red)
.withWheel(type: .normal)
.build()
// sportCar.wheel === .normal --> Defined by user
// sportCar.engine === Engine(V85000) --> Defined by SportCar implementation
{% c-block-end %}
In the code above, we can see that we have CarFactory as a factory object that generates each car base on the Builder that the user wants to inject into the parameters. The user creates the necessary builder through their required constructor on the specific builder. SportCarBuilder doesn’t have engine properties because in the SportCar object that consumes the builder will automatically adjust the engine with the required engine only for a sport car. This way, the specific requirement has been handled properly by the SportCar class.
In conclusion, the goal of the builder pattern is to reduce the need to keep mutable state — resulting in objects that are simpler and generally more predictable. By enabling objects to become stateless, they are usually much easier to test and debug, since their logic consists only of “pure” input & output. There are other multiple pros when it comes to using the builder pattern, even though this is not iOS Common design pattern but we can achieve it.
Remember, there are also various points to be considered before you go ahead with the builder pattern. Whether it is worth it or not to use this pattern on your project is entirely up to you.
Reference:
Builder in Swift from refactoring
Simplifying Objective-C Value Objects with Mantle and the Builder Pattern by Atomic Object
Using the builder pattern in Swift by Swift by Sundell


