
Introduction
Engage your users through image activity feeds as known from known social networks like Instagram and Pinterest.
This tutorial will discuss how to build an Android image feed application using Amity Social Cloud. By the end of this tutorial, you will have built your own social app capable of algorithmically ranking image posts in an aggregated feed from your community.
We’ll start with prerequisites for creating a new network in Amity Portal and a project in Android Studio. Then we’ll discuss how to create the Gradle setup and initialize the social SDK. After this, we’ll go through the implementation, and finally, we'll code the components and build out the screens.
As a result, you'll be able to transform your Android application into a powerful social product and engage your users with personalized feeds aggregating image posts from your community.
Prerequisites
Network Setup
- If you don't yet have an Amity account, please view the step by step guide of how to create a new network in Amity Portal.
Tools & IDE
You can download Android Studio 3.6 from the Android Studio page.
Android Studio provides a complete IDE, including an advanced code editor and app templates. It also contains tools for development, debugging, testing, and performance that make it faster and easier to develop apps. You can use Android Studio to test your apps with a large range of preconfigured emulators, or on your own mobile device. You can also build production apps and publish apps on the Google Play store.
Android Studio is available for computers running Windows or Linux, and for Macs running macOS. The OpenJDK (Java Development Kit) is bundled with Android Studio.
Environment Setup
Create a new Android app
First of all, we will need to create an application in AndroidStudio
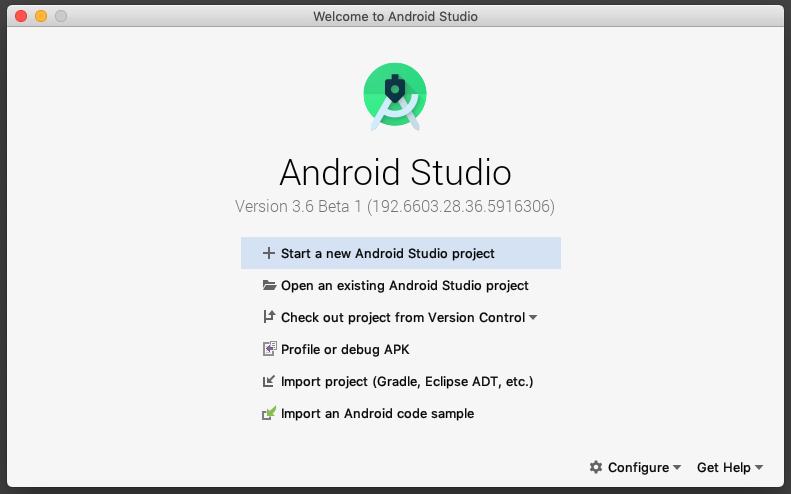
1. Open Android Studio.
2. In the Welcome to Android Studio dialog, click Start a new Android Studio project.
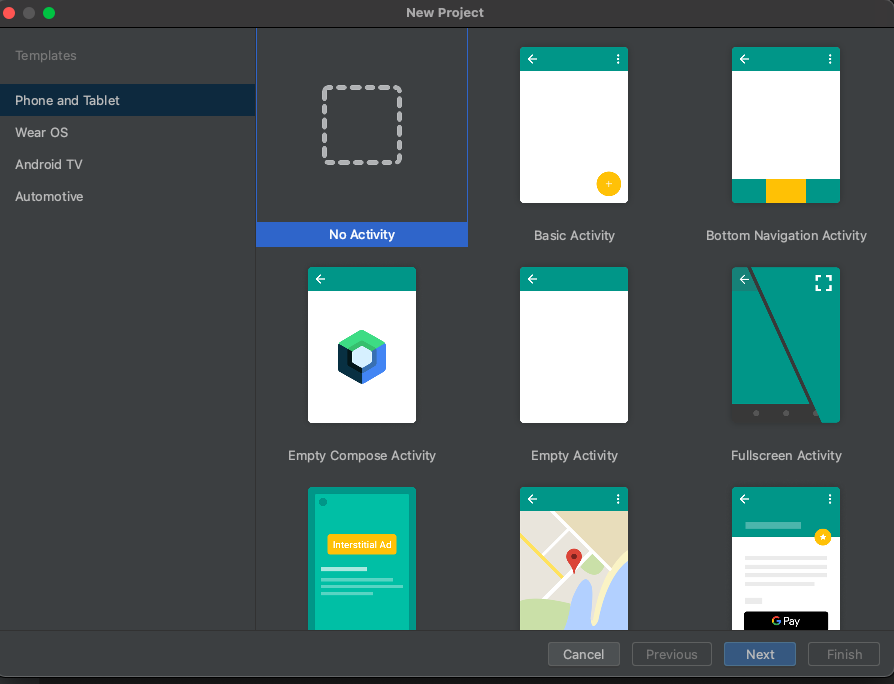
3. Select "No Activity" option and click Next
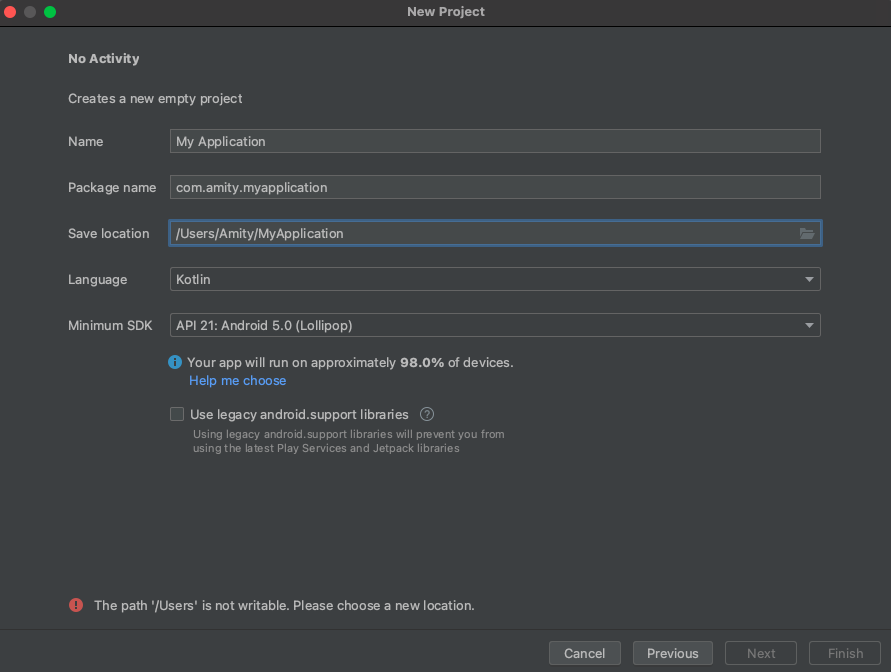
4. Name your application, package name and select the minimum SDK as API 21
Gradle setup
There are a few key dependencies that we need to include in the application. The image feed app needs abilities to interact with ASC SDK and render image. To render images we pick Glide library. It is simple and powerful image rendering library.
project's settings.gradle :
application's build.gradle :
Social SDK Initialization
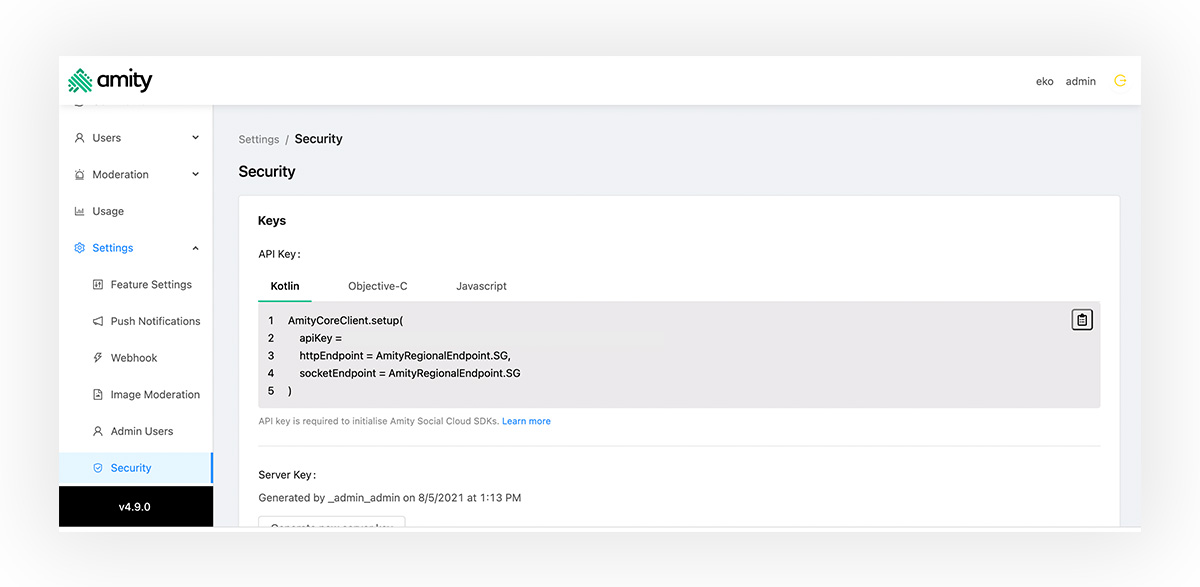
Before using the Social SDK, you will need to create a new SDK instance with your API key. Please find your account API key in Amity Social Cloud Console.
After logging in Console:
- Click Settings to expand the menu.
- Select Security.
- In the Security page, you can find the API key in the Keys section.
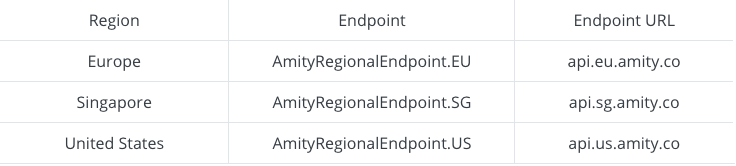
We currently support multi-data center capabilities for the following regions:
Then attach the api key and AmityEndpoint in the newly created application class. Once you created the application class, don't forget to declare it in AndroidManifest.xml as well.
Implementation Overview
Screens
First of all, what we're developing is an image feed application which would contain a few essential pages.
- Login screen - the page where the user identify himself/herself
- Image feed screen - the main page that shows the image feed
- Image post creation screen - the page where the user can upload a new image post to the feed
- Comment screen - the page where user can add, edit, remove and view comments in an image post.
Architecture
As Google recommended - each application should have at least two layers:
- The UI layer that displays application data on the screen
- The data layer that contains the business logic of your app and exposes application data.
You can add an additional layer called the domain layer to simplify and reuse the interactions between the UI and data layers. In this tutorial we'd like to adopt the principle and build our application by using MVVM architecture (as described in the image below).
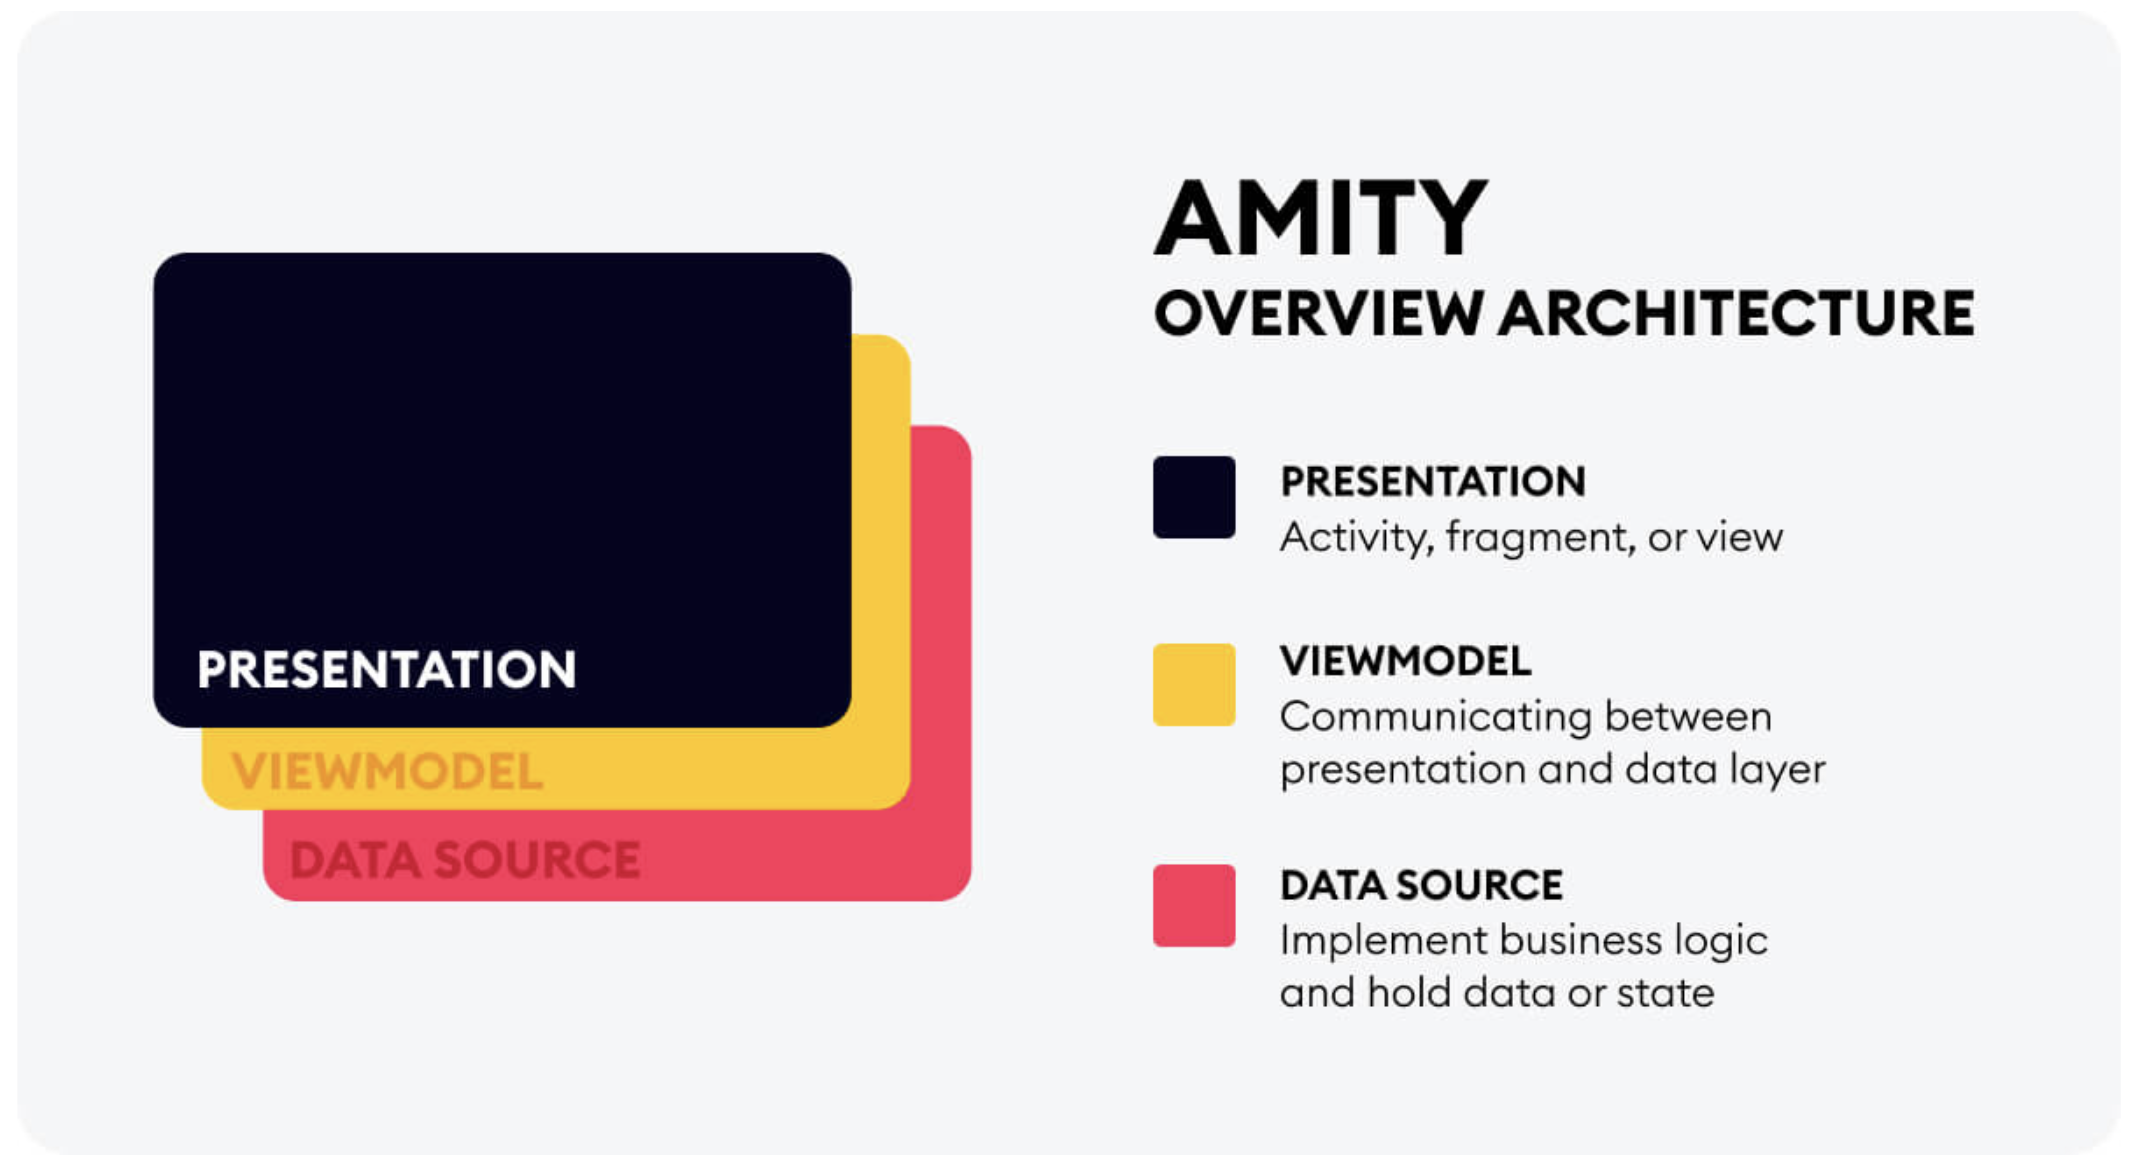
Presentation - is basically an Activity, Fragment, or View which is responsible for displaying UI (User Interface) and giving UX (User Experience) of users/ This component will interact with the View Model component to request, send, and save data or state.
ViewModel - is fully responsible for communicating between presentation layer and data layer and also representing state, structure, and behavior of the model in data layer.
Data source - is responsible for implementing business logic and hold data or state in the app (in this case Amity Social SDK).
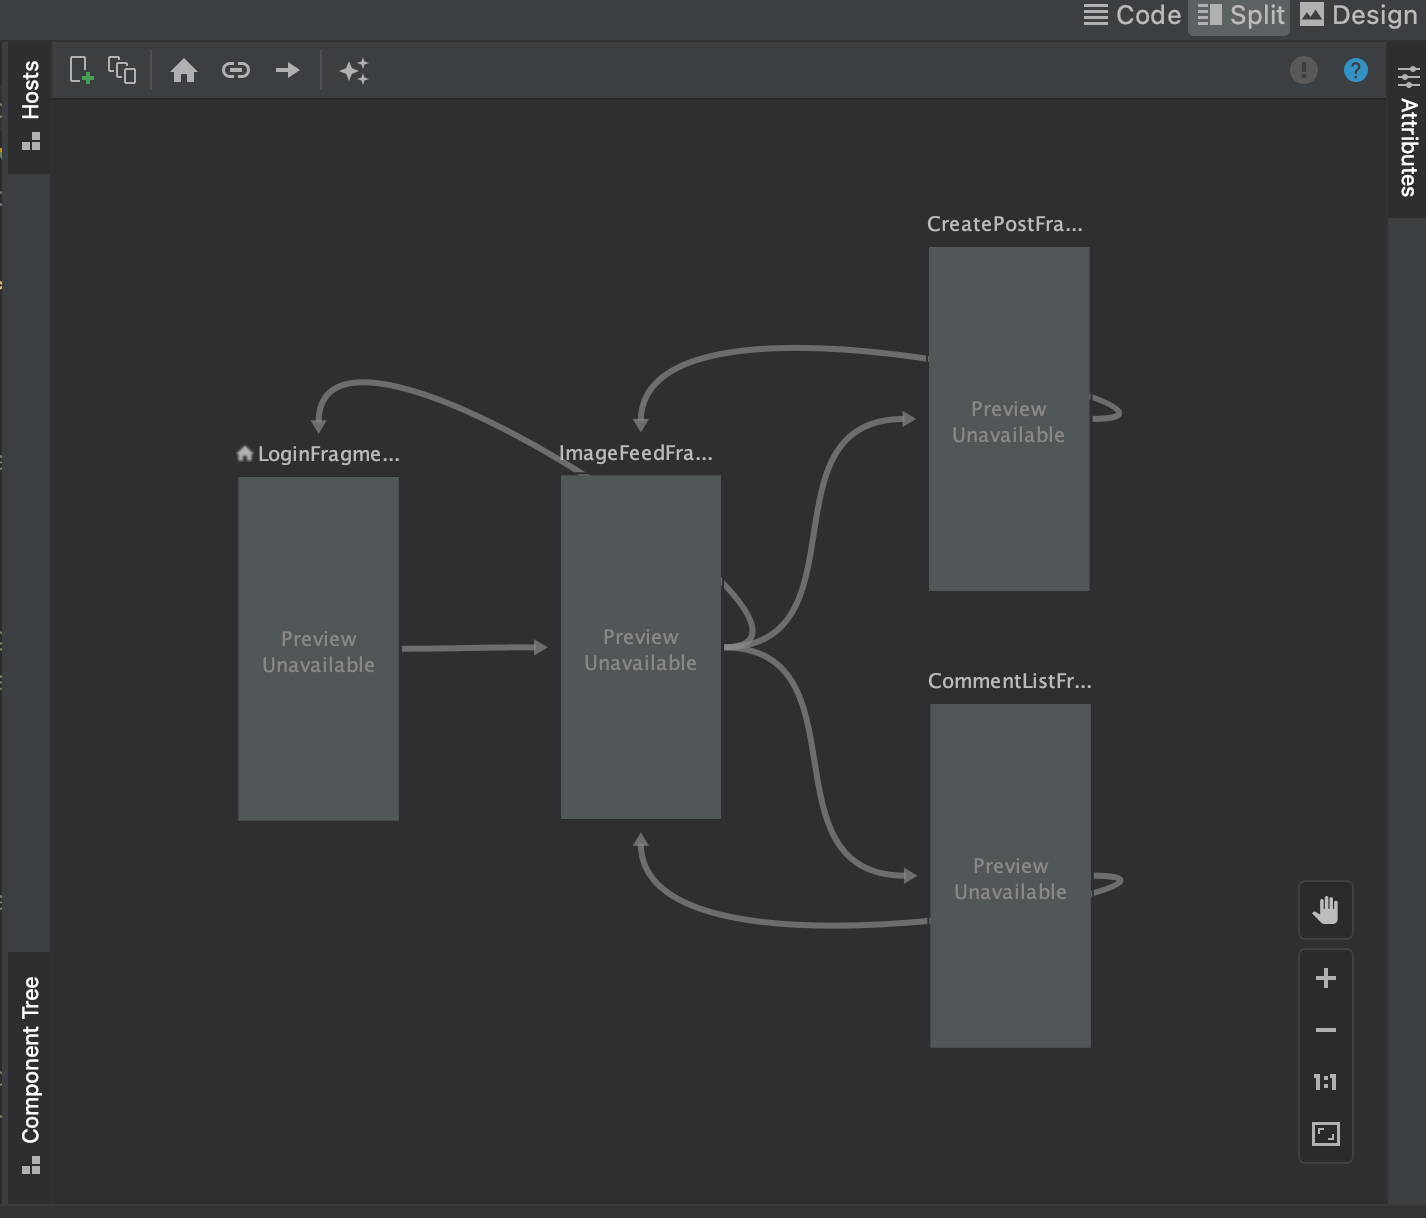
Navigation Graph
We now know that the essential screens are the login, image feed, post creation, and comment screens. Let's start by creating four blank fragments and build a navigation graph for them. The navigation should begin with the login screen and then move on to the image feed screen. The image feed screen should also have links to the comment list and the post creation screens.
Login Screen
In the past few sections, we already prepared everything for the app development. Now, it's time to start implementing the application.
Create a Login Screen Layout
To build the login screen, the most important part is definitely a layout. Let's build a simple login screen with a userId edit text input, a display name edit text input, and a login button by this following xml layout.
Create a Login View Model
Before we create an activity, we'd like to separate business logic in to view model as we mentioned earlier. However, since Amity Social SDK already handles the complexity on data layer, we won't need to create data layer in the application at all 🥁.
The expected function inside a login view model would only be a login() function. We need a user to authenticate to Amity Social Cloud system by using AmityCoreClient.login(userId) (For more information please checkout our public documentation).
Create a Login Fragment
Wooh! okay.. now we're ready to connect everything we built in to a fragment. When the user press the login button, a fragment will interact with a view model to login Amity Social Cloud system. The required fields will be retrieved from edit text inputs which are userId and display name. If the user is logged in properly, it will navigate to the main image feed screen. If an error occurs, it will show the toast that indicates the error.
Lastly we need an activity as a container for fragments. We're going to create an empty activity that specifies our created navigation graph as navGraph
layout :
activity class :
Before trying to compile code for the first time, don't also forget to declare MainActivity as a launcher activity as well.
Yayyy! we finally successfully created a simple login screen. Let's continue building image feed screen and image post creation screen in the next part!
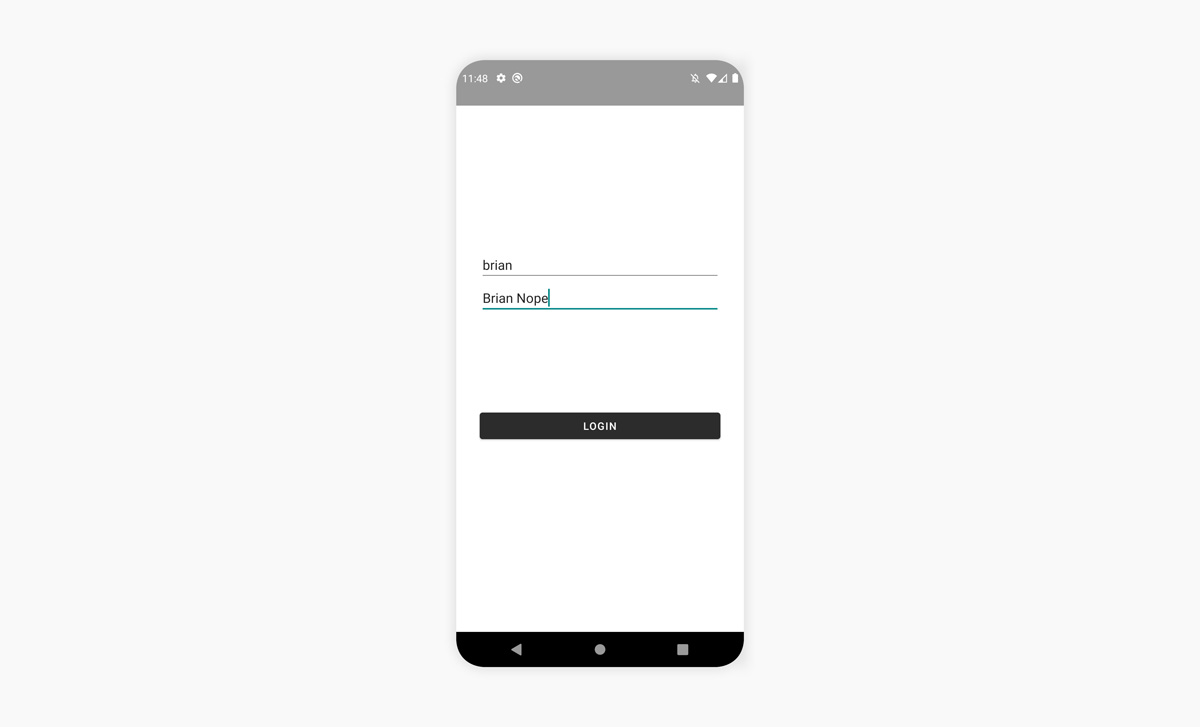
Image Feed Screen
This screen is a little more complicated and also has a number of different components on it. So, before we start implementing it, let's break it down as much as possible.
- Image feed main container - The page where combines all component together (ImageFeedFragment).
- Image feed viewmodel - The ViewModel class that stores and manages UI-related data in a lifecycle (ImageFeedViewModel).
- List of image posts - The list that shows a collection of image posts on the feed (ImageFeedAdapter).
- Empty state - The view when there's no posts on the feed.
- Floating action button - The button that allows the user to create the new post.
- Progress bar - The view when the feed is loading.
In the image feed screen, we can now see all of the necessary components. It's time to put them into action and combine them together 💫.
Create an Image Post Item Layout
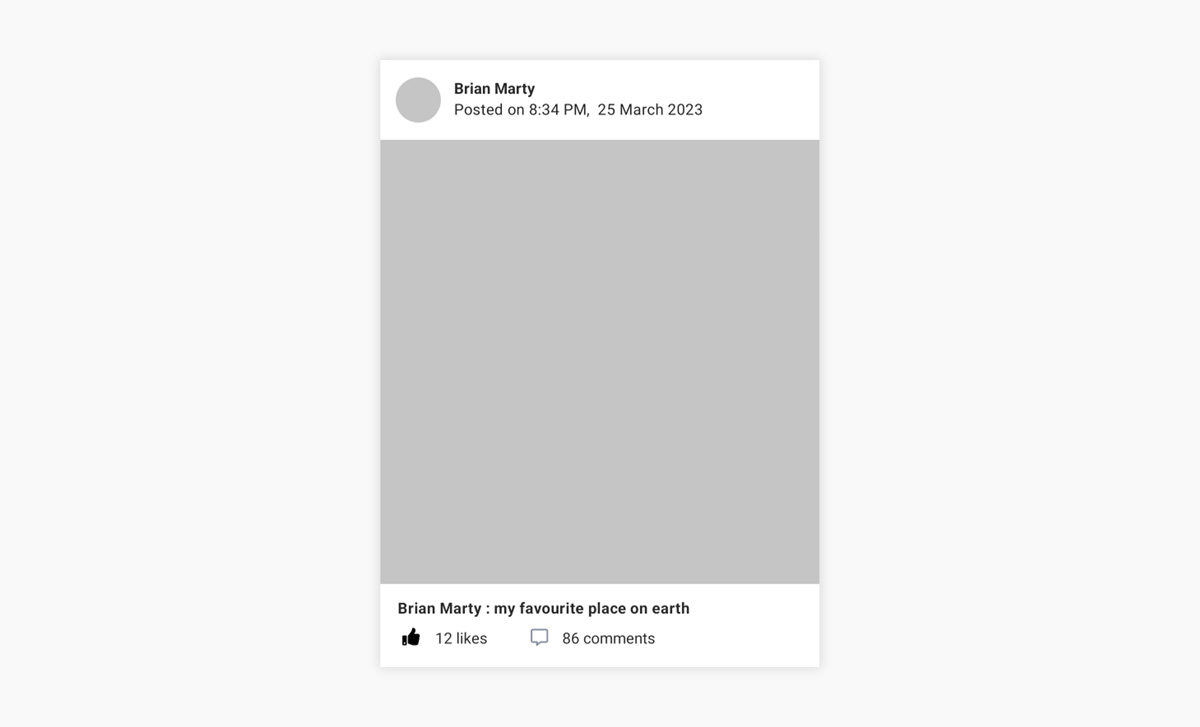
We're taking a bottom-up approach to creating the image feed screen, which means we'll start with a recyclerview holder layout first, and image feed screen afterwards. There would be three main elements towards the image post item arrangement. First, there's the header, which includes the poster's avatar and display name, as well as the time it was posted. The posted image is the second section, followed by the number of comments and reactions. Phew.. Let's see how the layout xml would look like.
Create an Image Feed Screen Layout
For the image feed, we created a recyclerview holder. Now we just need a recyclerview and a container for it. As earlier said, we'll have a page that displays a list of image posts, an empty state view when there are no posts, and a floating action button for creating new posts.

Create an Image Feed Viewmodel
The viewmodel would be simple and straightforward. In this view model, there is only one function getFeed(). The function is in charge of getting posts via AmitySocialClient and passing PagingData<AmityPost> to the presentation layer.
Create an Image Feed Adapter
We now know that the data return PagingData<AmityPost> model for us to render in the image post item after we created a viewmodel. To properly construct a recyclerview, two components are required for creating an image feed adapter: PagingAdapter and ViewHolder. Let's construct both classes now that the layout xml has been prepared as well.
ViewHolder :
PagingAdapter :
After we created the simple viewHolder and adapter, let's add a little more functionalities to the footer part. The footer should be able to add or remove a like reaction when clicking the like button, as well as the comment button, it should navigate the user to the comment list screen as well. The like button will only be highlighted if the current user already reacted to the post.
Create an Image Feed Fragment
Cool! Now it's time to put everything we've worked on together. This is the most intriguing aspect of the screen. Layouts, an adaptor, and a viewmodel have all been prepared. All of this will be combined into a fragment. The fragment will be in charge of interacting with the viewmodel and updating the view states. We need additionally deal with the loading, loading, and empty states of the feed. So, here it is!
Brilliant!! Let's try to run the app and see how it goes 🎉🎉
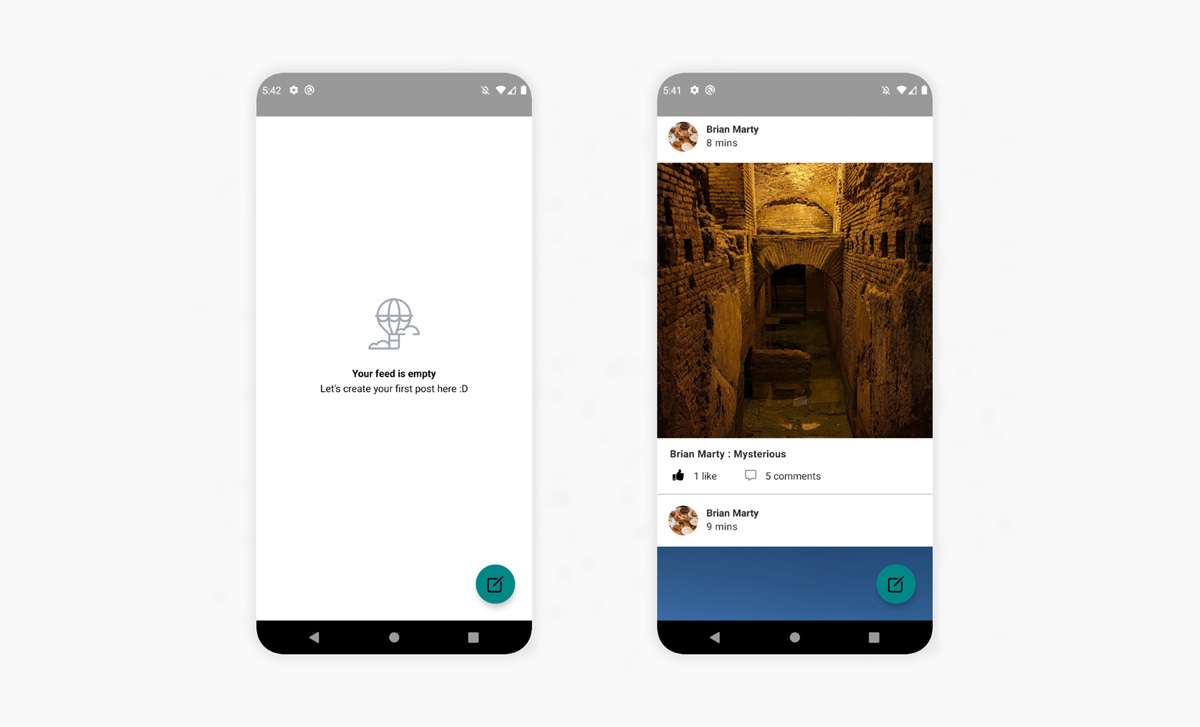
Image Post Creation Screen
Now that we can see pre-created image posts on a feed, it's moment to create a new post! Of course, we will consistently use the same structure of this screen as the image feed screen - a fragment, viewModel and xml layout.
Create an image post creation layout
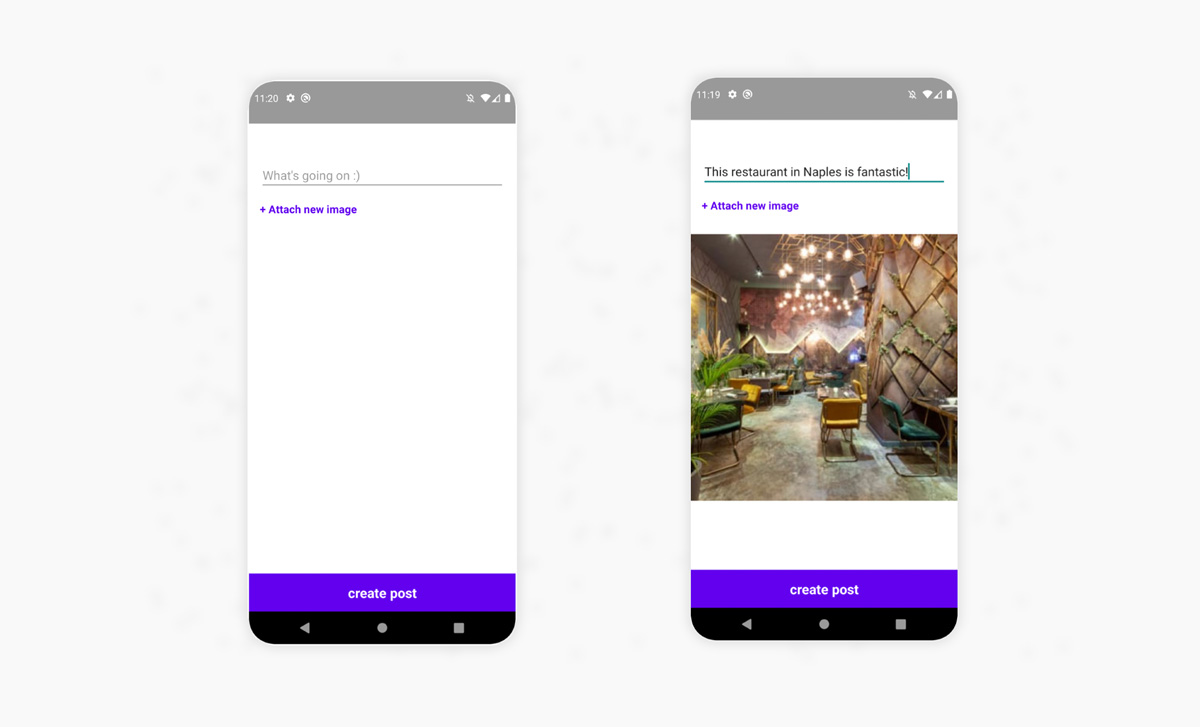
This screen's functionality should be straightforward. An EditTextView for the post description, a TextView for the image attachment button, an ImageView for the selected image preview, and finally a button to create the post.
Create an Image Post Creation Fragment
Select image from file picker
The most interesting part of the screen could be selecting an image from the user's device. To access users' images we will use the ACTION_OPEN_DOCUMENT intent action that allows users to select a specific document or file to open. Additionally, we can specify the type of the document as image/* to scope only image documents. Upon getting a document uri returned, we can use ContentResolver.takePersistableUriPermission in order to persist the permission across restarts.
Once the image is chosen, we also needs to render the image preview by using Glide as well.
Create an Image Post Creation ViewModel
This screen's view model is primarily responsible for creating an image post. Amity Social Cloud SDK requires two steps to create an image post: the first is to upload the image, and the second is to create a post using the image (see more details in this documentation).
Now let's go back to the CreatePostFragment and connect a function in viewModel to it. In the previous section, we're able to choose an image and render the preview already, we will now pass that image uri to the viewModel to create a new post.
All set for the image post creation screen! Let's run the application and see how awesome it is 🎉
Comment List Screen
The structure of the screen is very similar to that of the image feed screen. Let's break it down as much as possible.
- Comment list container - The page where combines all component together (CommentListFragment)
- Comment list viewmodel - The ViewModel class that stores and manages UI-related data in a lifecycle (CommentListViewModel)
- List of comments - The list that shows a collection of comments on the post (CommentAdapter)
- Empty state - The view when there's no comments on the post
- Progress bar - The view when the comment is loading.
Create a Comment Item Layout
We're again taking a bottom-up approach to creating the image feed screen, which means we'll start with a recyclerview holder layout first, and comment list screen afterwards. The comment item layout will be almost the same as image feed item layout, the header, which includes the commenter's avatar and display name, as well as the time it was created. Secondly, the comment text, followed by the number of reactions.
Create a Comment List Screen Layout
As described in the previous section, we only need a recyclerview to display a comment collection and a compose bar to write a new comment for the comment list screen's layout.
Create a Comment List Viewmodel
The viewmodel must support the screen's functions of getting a comment collection and creating a new comment. The two functions are handled by a comment repository provided by AmitySoicialClient.
Create a Comment List Adapter
We now know that the data return PagedList<AmityComment> model for us to render in the image post item after we created a viewmodel. To properly construct a recyclerview, two components are required for creating an image feed adapter: PagedListAdapter and ViewHolder. We replicated the majority of the rendering logic from ImageFeedAdapter because they have nearly identical presentation perspectives.
ViewHolder :
PagedListAdapter :
Create a Comment List Fragment
Pheww! It will be the last time we put all of our efforts together. A viewmodel, an adapter, and layouts have all been created. Everything will be condensed into a fragment. The viewmodel will interact with the fragment, and the view states will be updated. We also have to deal with the comments are loading, loaded, and empty states.
Yessssss 🎉🎉🎉 our app is now completed! we hope you enjoyed this tutorial. If you have any obstacles while implementing this tutorial, feel free to explore the code from this repository.